Monday, February 29, 2016

Watercolored Dogwood Wreath

Good morning all!  Yesterday was 70 degrees, and this morning, the sun was actually up before I was!  I don't want to jinx it, but Spring may be here;)  So it's no wonder that all I want to do it make cards with flowers, like this one...


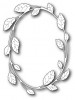
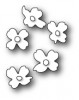
For my card today I used the Poppystamps Hampstead Frame Oval die and the Dogwoods Blossoms die.  Just a simple design really that started with watercoloring the wreath.  I'm no watercolor expert, but the only tip I can recommend is always using watercolor paper.  Seems like a no-brainer, but you get so much better results than plain cardstock. 


For the dogwood blossoms, I used blended ink instead of watercolors.  I wanted a more soft, blended look, so both the blossom and the yellow centers are blended ink.


The only "technique-y" thing I did with this card was use a partial inlay.  By that I mean, that when I die cut the wreath, I put together the wreath and the inside of the wreath before adhering it to the card.  Here's a closer look at the card from the side to give you a better idea of the layers...


And that's it for me!  As always, thanks so much for stopping by!  I'll be back later this week with more cards and an update on my craftroom:)   Have a great week!


Friday, February 19, 2016

Hoppy Day with Poppystamps

Hi everyone!  It's been way too long:)  I took a bit of time away from the craft table, and I'm so excited to jump back in!  I hope to have a bunch more cards to share in the coming weeks, starting with this card!  

We've gotten a ton of snow here in Northern Virginia, and as beautiful as it is, I'm ready for Spring!   So today I put together a Spring scene card using a bunch of my Poppystamps dies and stamps!  


My first step was to stamp and color the bunny.  Sometimes, I like to create different versions before choosing my favorite.  This time my favorite happened to be a fun version of a Peter Rabbit bunny with a bright blue coat.  I added the coat in myself and then outlined it with a Sharpie.  Just a fun, easy way to get more from your stamps:)


After fussy-cutting my bunny, I went to work on the background scene.  I started out by creating the sky background with the reverse cut clouds.  Then I cut the fence and grass pieces.  For the grass and sky, I wanted a bit of texture, so they are cut from watercolor paper.  The rest is just white card stock. 


The last step before finally assembly of the pieces was to add the sentiment.  Sentiment placement can get a bit tricky with these cards that have so many detailed pieces.   I didn't want the sentiment to get lost or for it to look too busy, so I decided to put the sentiment inside of one of the reverse die cut clouds.   

And that's it for me!  As always, thanks so much for stopping by!  Hope to see you again very soon with some fun new cards:)


Thursday, January 7, 2016

Poppystamps New Release Blog Blitz: Watercolored Dogwoods


Check out my second card for the new release Blog Blitz on the Poppystamps blog!  I used this gorgeous Falling Dogwood Blossoms die!  

While you're visiting the Poppystamps Blog Blitz, don't forget to leave some comments!  For every comment you leave, you have a chance to win one of the new release stamps or dies!  Could not be easier!

JJ signature

Monday, December 28, 2015

Trio of Paper Smooches Cards & a Farewell


Hello everyone!  I've got a few Paper Smooches cards to share today using the December release dies and stamps.  This first card uses the Adorable Array die which is just gorgeous!  Look at that detail!  I used it to die cut some shiny metallic gold card stock and layered it over a chalkboard sentiment (Delightful Greetings) and some subtle patterned paper.  I added a bit of large gold hexagon glitter and smaller clear iridescent hexagon glitter too (gotta love the shiny, right?).  


My second card uses the Criss Cross die.  This die measures about 3-1/2" square, so it makes a great background.  I used it to die cut some colored vellum and glued it inside of a circle aperture.  Since it's glued to the panel, the die cuts float over the card base.  


The little science guy (Great Chemistry) doubles as an artist when he's holding a paintbrush (Spring Fling).  The sentiment is from the Word Salad set.


My final card today is a shaker card using the Hello Love die and that's it!  The design of the die made it perfect to create a two-toned shaker.  


I stacked about 6 or 7 die cuts and they naturally made an upper "well" and a lower "well".  After I filled each "well", I glued a clear acetate heart over the die cuts to seal the heart.  Then I added one more die cut over the acetate to cover the raw edges of the acetate.  The trick to this look is glue your layers well and let it thoroughly dry before assembling your shaker.  


Before I go, I want to make an announcement that I'm stepping down from the Paper Smooches DT.  It has been an honor to be on the Paper Smooches team and I will miss it so!  Kim is one of the most talented and generous folks in the business (or anywhere for that matter;).  To be amongst the amazing folks on the DT was a dream for sure!  I cannot thank Kim enough for EVERYTHING!  Of course, I will always be a Paper Smooches fan and will be cheering them on from my part of the world always.  I only wish there were more hours in the day;)

To all the Paper Smooches fans I've met along the way, THANK YOU for all your support and kind words!  The Paper Smooches community is such an amazing and supportive bunch!  

Thanks for stopping by today and have a wonderful New Years! 

mahalo and aloha,
jj

Monday, November 30, 2015

Merry Houses with Poppystamps

How about one more holiday card idea?  It's not too late to create some handmade cards.  Especially with this idea that is so easy to mass produce but still creates unique cards.  


For the background, I used watercolor powder on watercolor paper.   To get this look, I started by brushing on just water with a wide brush.  Then I randomly sprayed the powders over the paper (just a tip, a little powder goes a long way).  If you love watercolors and are looking for a different look, definitely try the powders! 


The sentiment (Poppystamps Proper Merry Christmas die) was die cut into the background and inlaid back in with plain white paper.  The inlaid technique really makes the sentiment special:) 


The last step was to add the row of houses (Poppystamps Brevilla Houses die) with some foam tape.  I added one last touch with one of the windows backed with yellow.  That's mom up late wrapping the presents and baking goodies;)

Aloha!


Friday, November 27, 2015

Paper Smooches December Blog Hop

It's Pep Rally week and we are here today to share a sampling of the NEW Paper Smooches DECEMBER release with you!  TWO new stamps and TEN new dies will be available to purchase on November 27th at 8:00pm pacific time. Once our release goes live, you will find our new products HERE.  

To celebrate BLACK FRIDAY - we have a special sale for you.  At check out, type the code BFSALE15 in the coupon code box to receive 15% off your entire order.  The sale ends on Saturday, November 28th at 8:00pm PT.

To add extra fun to our blog hop...we are offering up a prize!  The prize - a $25 gift code to choose what you like at the PS online store.

Here are the details:
  • FOUR winners will be chosen at RANDOM from any of the design team blogs and the PS Blog to win the $25 prize.
  • Just leave a comment on any of the design team blogs listed below or the PS blog for your chance to win!  (you do not need to comment on all blogs to qualify but it increases your changes)
  • Deadline: You have until midnight PT on Sunday, November 29th to leave a comment. 
  • Please check the Paper Smooches blog on Monday, November 30th to see if you are one of the FOUR lucky winners. 

To increase your chances of winning:
  • Tell us that you Facebooked about our blog hop
  • Tell us that you Tweeted about our hop
  • Tell us that you posted on your blog about our blog hop
(which means that you have up to three extra chances to win on each blog)
Here's a list of all the hoppers in case you get sidetracked.  Kara Vrabel is filling in for Pamela Ho this month,  We hope Pamela is having a blast on her honeymoon!  :)  AND the amazing Jennifer Mc Guire is playing along with us today as well - yay!

JJ Bolton (you are here)

Now on to the cards!  I have a couple cards today using the new Birds dies.  These dies are the die version of the birds in the Natural Beauties stamp set.  And the 3 birds comes with a cute little branch. I love creating little scenes and these dies make it so easy.  


The branch is inlaid into the smaller cloud panel.  The bird is inlaid with the outline) and the whole thing was attached with some foam tape.  I added a couple leaves to the branch for some more color.  Isn't that little bird die adorable?


This next card uses all 3 of the bird dies.  This time I used the outline die cut as a reverse cut and backed it with a watercolored panel.  A fun and easy way to get a rainbow on your card.  For the eyes, I used a dot of Ranger enamel accents.  The sentiment is from the new set Delightful Greetings.  


Thanks for hopping with the Paper Smooches today!  The next stop on the hop is the fun and lovely Kalyn Kepner!  Have fun!

aloha,

jj

Serene Forest with Poppystamps

So how's everyone doing with their holiday cards?  Today I've got a serene forest scene card in black and white.  


For this card, I stacked 3 layers to create a 3D scene.  The deer layer was done by partially die cutting the deer and then finishing it off with the curved die in the Stitched Landscape set.  (I used the side of the die cut with just the straight line)


The two tree layers were done using a technique where you connect the die cuts end to end.  This is an easy trick to do with open-ended dies like the Stitched Evergreens die.  


On the base layer, I went with black misted with white ink.  I love the monochromatic look!  


I hope this card leaves you feeling peaceful and refreshed!  Have a great weekend!