Saturday, March 26, 2016

Easter Frames


I've got one more card to share for Easter today.  I was particularly prolific this year because I got some new Waffleflower Easter goodies.  These inverted scalloped dies are so cute and they are just so versatile.  This time I used them to make double layer frames.  


Can you tell that I had fun making these double layer frames?  (It's hard to see, but I especially love the one with the blush pink with the metallic gold underneath)  Super easy too.  

Inside the frame, I colored the image with some watercolor markers.  These are great to use for small detailed images like this.  


Thanks so much for stopping by today!   To all who are celebrating, an early Happy Easter!

Mahalo,
jj

Supplies:
Waffleflower Welcome Spring Stamps
Waffleflower Egg Hunt Stamps
Waffleflower Flower Circles Inverted Dies
Kuretake Clean Color Watercolor Pens
Memento Tuxedo Blank Inkpad

Wednesday, March 23, 2016

Eggs for Easter


It's Spring Break for us here and I'm getting ready for Easter with some more of my Waffleflower goodies!   These two cards actually use the same stamp and die sets from the new Waffleflower release.  As soon as I saw the Flower Circles Inverted Die, I had to put in an order;)  For this card, I used the smaller of the 2 circle dies.  These dies are just adorable!


For my next card, I used the circle dies again, but this time I used the negative cuts.  First I die cut the large circle to create the frame.  


Then I used the inside of the smaller circle dies to create a multi-layer sun with card stock and vellum.  


I used the sun to create a little scene inside the frame.  The fluffy little lamb is from the Welcome Spring set.  


That's it for me!  Hope everyone is having a wonderful week:)

Mahalo,
jj

Supplies for both cards:
Waffleflower Welcome Spring Stamps
Waffleflower Egg Hunt Stamps
Waffleflower Flower Circles Inverted Dies
Copics
White Pen
Memento Tuxedo Blank Inkpad

Friday, March 18, 2016

Craft Room Additions & Gift Box Cut File

Today, I have a couple things that I haven't done in a while, a quick update on my craft room and a free cut file!


First, let's talk craft room!  For the most part, I haven't made major changes in my room, but I do have a new storage system for my sequins and glitters.  I have a ton of small embellishments and I like to be able to see them when I work.  Some of you all know that I work in a lab, so this storage solution will not be a surprise;)  My old system (condiment cups like this) was getting hard to store and organize, so these clear plastic disposable test tubes were the perfect alternative.  Plus, the test tubes are nice and organized in plastic racks that hold up to 40 tubes.  I keep them arranged by color and they are a joy to look at and use.  If you're interested in trying something similar, there are lots of options for tubes and racks on Amazon and other places online.  Most of them are very inexpensive (especially when you don't need lab-quality stuff). 


I also added one more piece of furniture to my room.  In my never ending quest to position both my Silhouette Cameo and Brother Scan N Cut out in the open where I can store and use them, I found the perfect cart!  Technically, it's an Ikea coffee table, but the wheels make it more like a cart.  I had been searching for a cart for this purpose and could not find one that was big enough and without a lip around the edge.  The shelves on this cart/table are perfectly smooth (rounded edges) and that means that I can actually cut on the cart/table without worrying about my mats catching on the edge of the shelf.  Believe it or not, I can now cut on both machines at the same time.  Just plug and go!  I'm a happy gal:)  


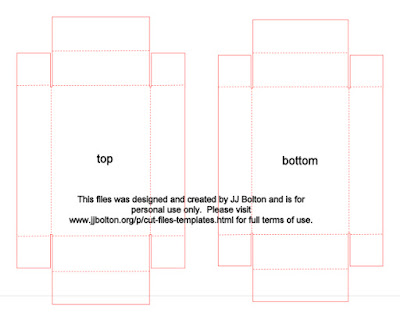
And speaking of cutting machines, I've been using my Silhouette to make these little gift boxes.  I created this custom gift box to fit 3 test tubes, but they are a great size for a small things like jewelry, bar of soap, or candy.  I have a been making a ton of boxes with my extra scrapbook paper and sending out goodies to crafty friends:)    


If you want to download the Silhouette studio file (for free!), please go to my cut file page here.  I have this file and lots more to share.

And if you are interested in other craft room ideas, check out the following posts:

Have a fantastic weekend!  Thanks so much for stopping by!

Mahalo and Aloha,
jj

Thursday, March 10, 2016

Teacup Kitten


Today I'm enjoying a card that I made just for fun (can you imagine? lol).  I used some of my new goodies from Waffleflower to create this little kitten in a teacup card.  It's pretty straightforward but I have one tip to share.  I wanted to have the kitten inside the teacup, but in this case masking was too difficult.  It's hard to mask when the kitten is in front on the left, but the cup is in front on the right.

Instead, I stamped the teacup on a panel so that I could cut an opening along the lip of the cup.   Then I fussy-cut the kitten and slipped him in to the cut opening.  Here's a closer pic of what I'm talking about...


The result is a fun little 3-D effect that was way easier to do than masking!


Thanks for stopping by today!    Have a good one!

Mahalo,
jj

Supplies:
Waffleflower Welcome Spring Stamps
Waffleflower Warm Wishes Stamps
Copics
Xacto Knife
Distress Inks
Memento Tuxedo Blank Inkpad

Thursday, March 3, 2016

Poppystamps Challenge: Spring Fling

It's a new month and that means a new Poppystamps Challenge!  This month the theme is Spring Fling!   I've been doing a bunch of flowery cards, so I thought this time I'd try a different Spring-y theme.  How about birdhouses?


For my card, I used just the Alpine House and Roofs Background dies to make my own little birdhouses:)  These dies are usually paired with the Alpine House collection, but they are perfect alone as birdhouses.  For my tree branch, I used the full cover die Exquisite Branch Frame.  This die is a full A2 size, but I just pruned a few branches to get this...


For my birdhouses, I created the 3D effect by shading the part under the roof.  I used a bit of Post-It tape to mask off one side and blended more ink.  For the roofs, I attached them with foam tape and adhesive.  By placing foam tape just on the bottom of the roof piece, it gives the roof a pitched effect.  


For the "hole" in the birdhouse, I just found one of my stencils with lots of circles and used blended inkI forgot to mention that the background is watercolored and I "hung" the birdhouses with some twine.  This last pic shows how the roof pitches out at the bottom.


Hope you join in the challenge!  

Aloha!