
Wednesday, September 30, 2015


Saturday, September 26, 2015
Bright Cards with Paper Smooches
Today I want to share a couple of Paper Smooches cards! This first card uses one of the fun Borders 3 dies. I die cut a piece of watercolored paper to make 6 border strips. (BTW, I used my watercolor powders for the coloring)

Just a tip on placing the strips in the aperture. I glued all the border die cuts to a strip of clear acetate. The acetate is invisible but it keeps all the borders together and flat. I cut the overall circle panel a little smaller than my card front and covered my card front in gold foil. It gives the card a nice gold "frame".

This next card uses the Kibitzing Two stamps and coordinating die set. The background is made with just a scrap piece of paper and blended gold ink. The menorah is stamped, colored with Copics, and then die cut (love the coordinating die for this image!). Instead of stamping the flames, I used gold sequins.

Thanks for stopping by today! I hope you have a great weekend!
Mahalo and Aloha,
jj
Thursday, September 24, 2015
Paper Smooches October Blog Hop
It's Pep Rally week and we are here today to share a sampling of the NEW Paper Smooches OCTOBER release with you! THREE new stamps and NINE new dies will be available to purchase on September 30th at 8:00pm pacific time. Once our release goes live, you will find our new products HERE.
To add extra fun to our blog hop...we are offering up a prize! The prize - a $25 gift code to choose what you like at the PS online store.
Here are the details:
- FOUR winners will be chosen at RANDOM from any of the design team blogs and the PS Blog to win the $25 prize.
- Just leave a comment on any of the design team blogs listed below or the PS blog for you chance to win! (you do not need to comment on all blogs to qualify but it increases your changes)
- Deadline: You have until midnight PT on Sunday, September 27th to leave a comment.
- Please check the Paper Smooches blog on Monday, September 28th to see if you are one of the FOUR lucky winners.
JJ Bolton (you are here)
To increase your chances of winning:
• Tell us that you Facebooked about our blog hop
• Tell us that you Tweeted about our hop
• Tell us that you posted on your blog about our blog hop
(which means that you have up to three extra chances to win on each blog)
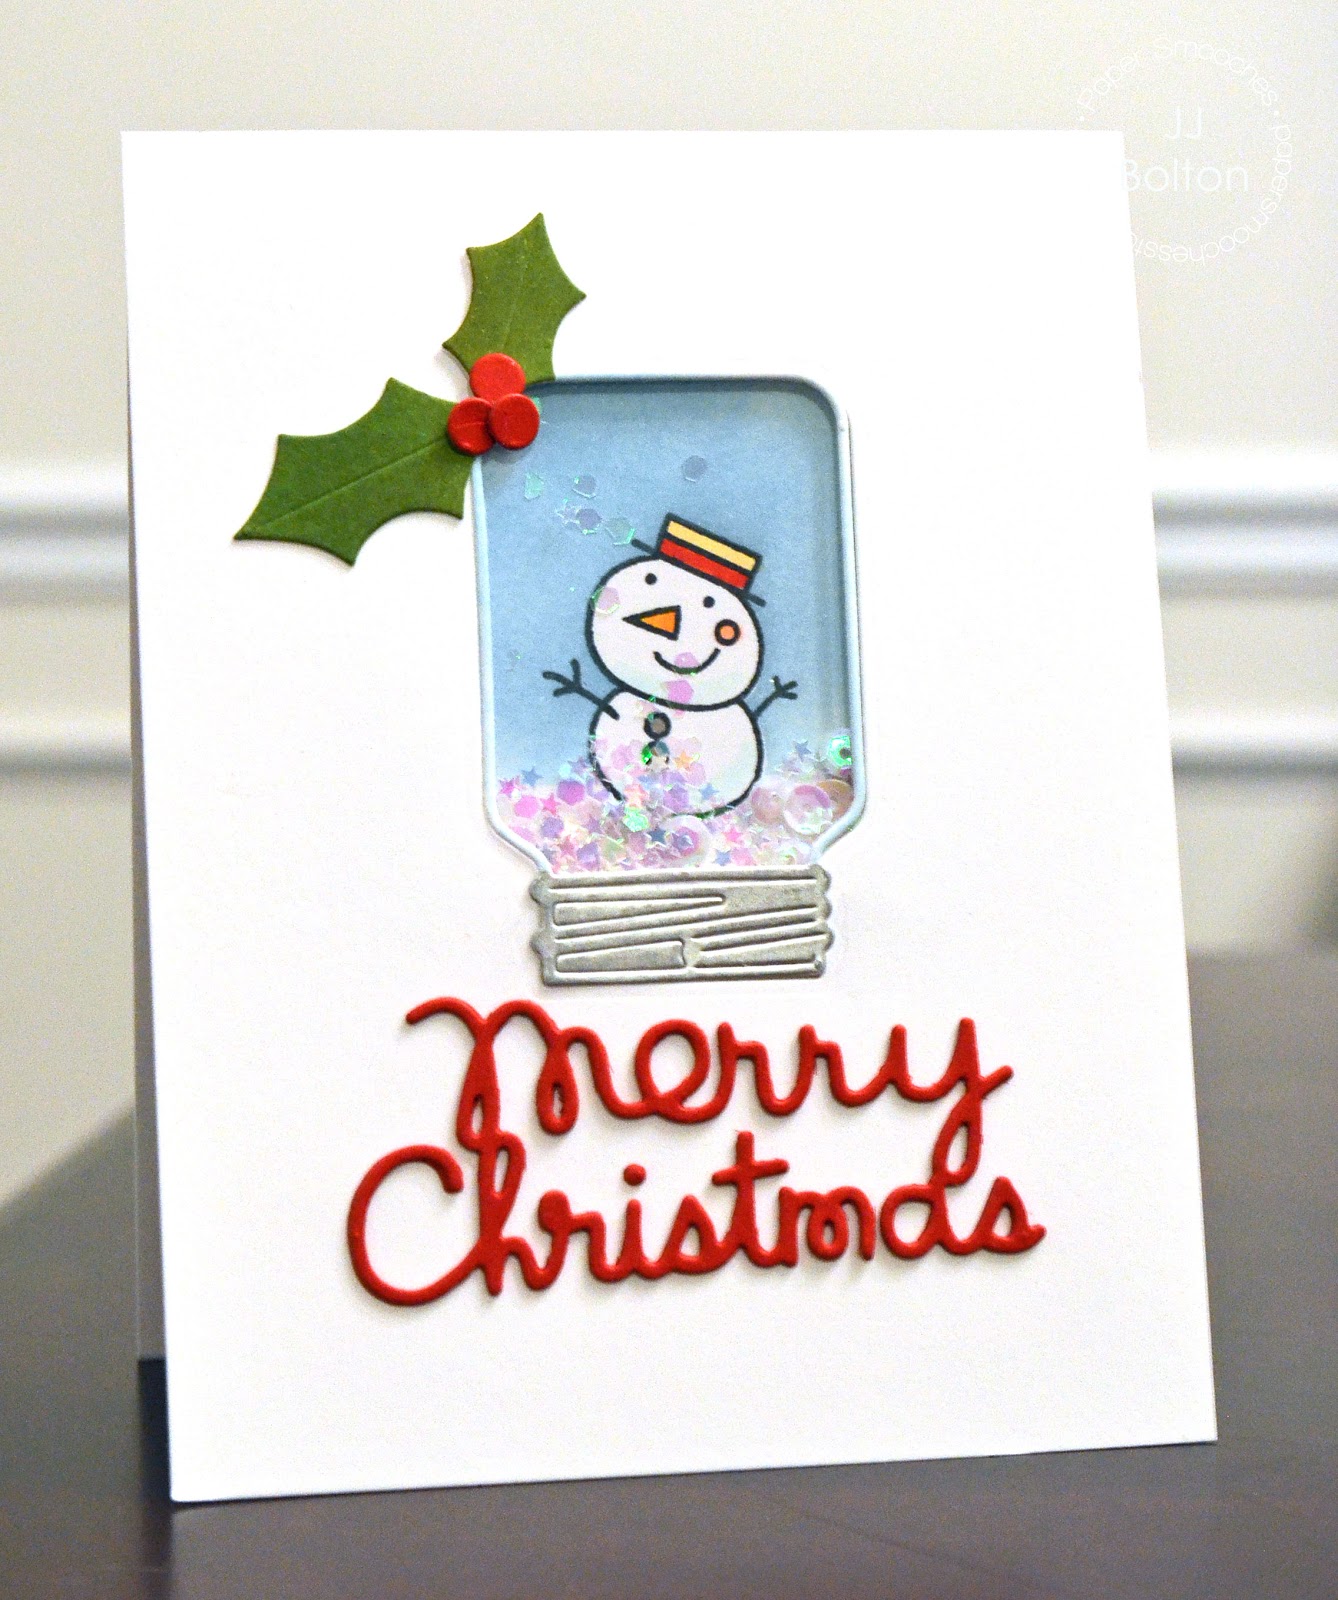
Are you ready to take a look at some of the new release? I used a bunch of the new dies in my card, but the focal point is one of the adorable Mason Jar dies. I used the die to create something that I've actually made in real life, a Mason jar snow globe! Since the Mason jar has a thin edge, I created an inlaid shaker (the shaker is flush with the card panel as opposed to on top of it). One of the snowmen from the Swanky Snowdudes set was the perfect size for inside my snow globe:)

The Holly die and the Merry Christmas die are also from the new release. To make the sentiment a bit bolder, I layered two of the die cuts together. So much fun making holiday cards again!

Thanks for hopping with the Paper Smooches gang today! The next stop on the hop is the lovely Kalyn Kepner! Have fun!
aloha,
jj
Are you ready to take a look at some of the new release? I used a bunch of the new dies in my card, but the focal point is one of the adorable Mason Jar dies. I used the die to create something that I've actually made in real life, a Mason jar snow globe! Since the Mason jar has a thin edge, I created an inlaid shaker (the shaker is flush with the card panel as opposed to on top of it). One of the snowmen from the Swanky Snowdudes set was the perfect size for inside my snow globe:)

aloha,
jj
Snow Globe Shaker with Avery Elle
Hi everyone! In my book, nothing is more fun than a Christmas card, unless you make a shaker Christmas card;) Today I used the Avery Elle Snow Globe stamps and dies (along with some stamps from the Joy to the World stamp set) to create this little shaker card...

A couple tips for creating a shaker card like this. First, I used an inlaid die cut to create that snow drift in the foreground. Second, an inlaid shaker card is easier to do than a popped up one. (No having to deal with thin strips of foam tape:)

Thanks for stopping by today!
jj

A couple tips for creating a shaker card like this. First, I used an inlaid die cut to create that snow drift in the foreground. Second, an inlaid shaker card is easier to do than a popped up one. (No having to deal with thin strips of foam tape:)

Mahalo,
Monday, September 21, 2015
Envelope Shaker Tags with The Greeting Farm
Good Monday everyone! Over the summer, I was lucky to get a package from the folks over at the The Greeting Farm and I just wanted to share a couple tags I made with the Always a Party and Make a Wish clear stamps and coordinating dies sets. Aren't these little bears the cutest?

The Always a Party set has the cutest little bear family, and I'm especially smitten with the little boy bear and little girl bear stamps. So I paired them up with some cupcakes and banners from the Make a Wish set. Don't they all look like they belong together? Of course, I could have left the tags just as they were here...

But I wanted to dress them up just a bit more. I've used my Fuse tool to make a shaker before (check it out here), but this time I wanted to make an envelope shaker. I placed my tag inside of a page protector like so...

Then I took the Fuse tool and the ruler and created a seal down both sides of the tag. [FYI, I used the "fuse" tip as opposed to the seal tip for the Fuse tool. It's a matter of personal preference, but I like that stitched look.] I left the top open so I could fill the shaker with various types of sequins and glitter.

Then I sealed the top of the tag (followed along the shape of the top of the tag). This was so much fun!
That's it for me today! Thanks for stopping by today and thanks to The Greeting Farm for the chance to work with such fun stamps and dies! BTW, if you stop by and pick up anything at The Greeting Farm, use the code "JJB10" for 10% off.
XOXO,
jj

The Always a Party set has the cutest little bear family, and I'm especially smitten with the little boy bear and little girl bear stamps. So I paired them up with some cupcakes and banners from the Make a Wish set. Don't they all look like they belong together? Of course, I could have left the tags just as they were here...

But I wanted to dress them up just a bit more. I've used my Fuse tool to make a shaker before (check it out here), but this time I wanted to make an envelope shaker. I placed my tag inside of a page protector like so...

Then I took the Fuse tool and the ruler and created a seal down both sides of the tag. [FYI, I used the "fuse" tip as opposed to the seal tip for the Fuse tool. It's a matter of personal preference, but I like that stitched look.] I left the top open so I could fill the shaker with various types of sequins and glitter.

Then I sealed the top of the tag (followed along the shape of the top of the tag). This was so much fun!
That's it for me today! Thanks for stopping by today and thanks to The Greeting Farm for the chance to work with such fun stamps and dies! BTW, if you stop by and pick up anything at The Greeting Farm, use the code "JJB10" for 10% off.
XOXO,
Thursday, September 17, 2015
Fang-tastic Thursday with Avery Elle
Hi guys! I have a fun little card to share with you today using the new Monsters stamps/dies from the Fall Avery Elle release. This Monsters set has so many options not only for Halloween but birthdays and more. I thought I'd do an "anytime" card because I really wanted to use those adorable balloons. I love the way they look die cut!

I colored my little green monster with Copics, die cut him, and attached him to the circle frame. (I can't seem to stop using those Double Pierced Circles dies!) The background is bit of patterned paper in Vino.

That's it for me today! Thanks for visiting!
jj

I colored my little green monster with Copics, die cut him, and attached him to the circle frame. (I can't seem to stop using those Double Pierced Circles dies!) The background is bit of patterned paper in Vino.

XOXO,
Saturday, September 12, 2015
Heartfelt Thanks with Paper Smooches
Just stopping in with a quick Paper Smooches card! I'm using one of the new Paper Smooches word dies, Heartfelt Thanks. The font on this one is adorable:) I tried something a little different with a word die by coloring the letters with Copic markers. Just another fun way to use your word dies:)

The cute little kitty is from the Chubby Chums set. The little kitty is stamped directly to the card base, and I fussy cut a pair of paws and glued to the top of the tag to make it really look like he's holding on to the tag.
Thanks for stopping by today! I hope you have a great weekend!
Mahalo and Aloha,
jj
Friday, September 11, 2015
Two for Thursday with Avery Elle
Hi guys! Just stopping in to share a couple of cards I made with the summer Avery Elle release! Let's start off with a holiday card using the Dashing stamp set. Isn't that little car cute? The car has been stamped and partially fussy cut. By that I mean, I only fussy cut around the top of the car, and then used the wavy die from the Custom Panels set to create the snowy road. I layered the fussy cut piece over another panel to get that 3D look. I added a little blended ink behind the car to really make it stand out.
Before I move on to the next card, here are a couple more techniques that I used on this card. The first is for color matching. Mismatched colors make me crazy, lol! I wanted the red of the car to match the red of the banner, but I didn't have the right Copic color. To get that perfect match, I blended a scrap piece of paper with the same red ink as the banner. Then I stamped it and paper pieced just the car body. (Note, sometimes a stamped image can smear when ink is blended over it.)
My next technique, I'll call "no outline die cutting". The banner on this card was created with a stamp and coordinating die. The banner die cuts a thin outline around the banner stamp. I wanted full color coverage on the banner, so I used a small sponge blender to blend the red ink around the edge of the banner to cover up the white. It really changes the look, doesn't it?

Now on to my next card which uses the adorable set Pick N Mix which was designed by Caryn Davies! This set is all kinds of cute!!! I used the stamps from this set along with the Sweet Scallops dies to create a shaker card. (I still love shakers:) First, I stamped, colored, and die cut a variety of candy pieces. Then, I stamped the candy bag onto a die cut oval and used a craft knife to cut out just the inside of the bag.

Inside the shaker, I put in the pieces along with some coarse glitter (looks like sugar, no?). Just a tip for shakers with die cuts, use two layers of foam tape. I needed that extra depth to allow room for the die cuts to really SHAKE! So, so much fun to make:)

That's it for me today! Thanks for visiting!
jj
Before I move on to the next card, here are a couple more techniques that I used on this card. The first is for color matching. Mismatched colors make me crazy, lol! I wanted the red of the car to match the red of the banner, but I didn't have the right Copic color. To get that perfect match, I blended a scrap piece of paper with the same red ink as the banner. Then I stamped it and paper pieced just the car body. (Note, sometimes a stamped image can smear when ink is blended over it.)
My next technique, I'll call "no outline die cutting". The banner on this card was created with a stamp and coordinating die. The banner die cuts a thin outline around the banner stamp. I wanted full color coverage on the banner, so I used a small sponge blender to blend the red ink around the edge of the banner to cover up the white. It really changes the look, doesn't it?

Now on to my next card which uses the adorable set Pick N Mix which was designed by Caryn Davies! This set is all kinds of cute!!! I used the stamps from this set along with the Sweet Scallops dies to create a shaker card. (I still love shakers:) First, I stamped, colored, and die cut a variety of candy pieces. Then, I stamped the candy bag onto a die cut oval and used a craft knife to cut out just the inside of the bag.


That's it for me today! Thanks for visiting!
XOXO,
Thursday, September 3, 2015
Avery Elle Fall Release Blog Hop

I'm so excited to be here with the new Avery Elle Fall release! All the new goodies are available on the Avery Elle website now! There are so many fun new stamps and dies, you need to check it out!
For my projects today, I'm using the new set I designed called Penguin Greetings. It's a mini 3"X4" stamp set and a separate set of coordinating dies. The stamp set features a family of penguins that you can mix and match for all kinds of cards. My first card uses the largest of the penguin stamps with the coordinating "warm" word die. I made a frame using the Double Pierced Circle dies and added some patterned paper for my background.

This next card uses one of the smaller penguins in the set with the snowboard die. I created my snowy hill with the arc die from the Custom Panels die set. To get that chevron pattern I used one of the stamps in the Rounded Diamonds set.

Here's a close up of the die cut penguin on his snowboard. I really love the smaller scale of these stamps! So cute!

Now are you ready for a giveaway? To celebrate our Fall 2015 Release Blog Hop, Avery Elle is giving away a $25 Gift Certificate to one random winner. To enter to win just comment on this post. There is no purchase necessary and you must be 18 years of age or older to enter. This giveaway is void where prohibited. You can also do options 2, 3, 4, 5 or all 6 of the following to increase your chances of winning. You have until midnight Sunday, September 6th to enter. The winner will be announced on the Avery Elle Blog on Monday, September 7th . All products are available for purchase in the Avery Elle store right now.
To enter to win you can do 1, 2, 3, 4, 5 or all 6 of the following to increase your chances:
- Comment on any of the design team's posts and/or here on the Avery Elle Blog
- Follow us on Twitter and tweet the contest (we are @averyellestamps )
- Follow us on Facebook (we are www.facebook.com/AveryElle ) and share us with your friends - make sure they tell us you sent them.
- Follow us on Pinterest
- Become a blog follower through email (comment on the Avery Elle blog if you already follow us)
- Join our Flickr group (comment on the Avery Elle blog if you already belong)
The next stop on the hop is the awesome Yainea, but here's the full hop list just in case. (BTW, did you see the new name on the list? Hint, she's awesome!)...
Avery Elle / Jamie
Karolyn Loncon
Caryn Davies
Heather Campbell
JJ Bolton (that's me:)
Yainea
Melania Deasy
Katie Gehring
Amy Kolling
Maska Vanacker
Thanks so much for stopping by!
Aloha,
jj
Karolyn Loncon
Caryn Davies
Heather Campbell
JJ Bolton (that's me:)
Yainea
Melania Deasy
Katie Gehring
Amy Kolling
Maska Vanacker
Thanks so much for stopping by!
Aloha,
jj
Subscribe to:
Posts (Atom)