Monday, February 29, 2016

Watercolored Dogwood Wreath

Good morning all!  Yesterday was 70 degrees, and this morning, the sun was actually up before I was!  I don't want to jinx it, but Spring may be here;)  So it's no wonder that all I want to do it make cards with flowers, like this one...


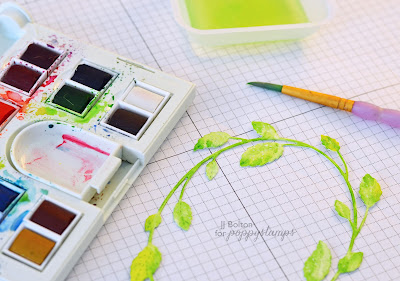
For my card today I used the Poppystamps Hampstead Frame Oval die and the Dogwoods Blossoms die.  Just a simple design really that started with watercoloring the wreath.  I'm no watercolor expert, but the only tip I can recommend is always using watercolor paper.  Seems like a no-brainer, but you get so much better results than plain cardstock. 


For the dogwood blossoms, I used blended ink instead of watercolors.  I wanted a more soft, blended look, so both the blossom and the yellow centers are blended ink.


The only "technique-y" thing I did with this card was use a partial inlay.  By that I mean, that when I die cut the wreath, I put together the wreath and the inside of the wreath before adhering it to the card.  Here's a closer look at the card from the side to give you a better idea of the layers...


And that's it for me!  As always, thanks so much for stopping by!  I'll be back later this week with more cards and an update on my craftroom:)   Have a great week!


Friday, February 19, 2016

Hoppy Day with Poppystamps

Hi everyone!  It's been way too long:)  I took a bit of time away from the craft table, and I'm so excited to jump back in!  I hope to have a bunch more cards to share in the coming weeks, starting with this card!  

We've gotten a ton of snow here in Northern Virginia, and as beautiful as it is, I'm ready for Spring!   So today I put together a Spring scene card using a bunch of my Poppystamps dies and stamps!  


My first step was to stamp and color the bunny.  Sometimes, I like to create different versions before choosing my favorite.  This time my favorite happened to be a fun version of a Peter Rabbit bunny with a bright blue coat.  I added the coat in myself and then outlined it with a Sharpie.  Just a fun, easy way to get more from your stamps:)


After fussy-cutting my bunny, I went to work on the background scene.  I started out by creating the sky background with the reverse cut clouds.  Then I cut the fence and grass pieces.  For the grass and sky, I wanted a bit of texture, so they are cut from watercolor paper.  The rest is just white card stock. 


The last step before finally assembly of the pieces was to add the sentiment.  Sentiment placement can get a bit tricky with these cards that have so many detailed pieces.   I didn't want the sentiment to get lost or for it to look too busy, so I decided to put the sentiment inside of one of the reverse die cut clouds.   

And that's it for me!  As always, thanks so much for stopping by!  Hope to see you again very soon with some fun new cards:)